 by
by A street is a row of boxes on one floor under one horizon, and drawing it well is mostly a matter of refusing to draw any building as anything but a box until its box is right. How to draw buildings in perspective comes down to one habit and one piece of arithmetic. The habit is refusing to draw any detail until its box is right. The arithmetic is dividing that box into floors and bays in perspective rather than at even spacing, which is the mistake that makes a drawn facade look like wallpaper.
Buildings in perspective are boxes standing on the ground plane with their vertical edges vertical (level camera, two-point) or converging (tilted camera, three-point), whose horizontal edges recede to vanishing points on the horizon at the viewer's eye height. Because every building in a street shares the ground and the horizon, they share the same two vanishing points when their walls are parallel, and every floor height carried along the street lands on the same receding line.
Step 1 — the camera
Three decisions before any line. Horizon: your eye height, 1.6 m standing, which will cross every ground-floor door at handle height and every pedestrian at the head. Lens: 24–28 mm for a whole street with sky, 35 mm for a natural view, 50 mm and longer for a single facade seen calmly from across the road. Angle: straight down the street for one-point, from a corner for two-point.
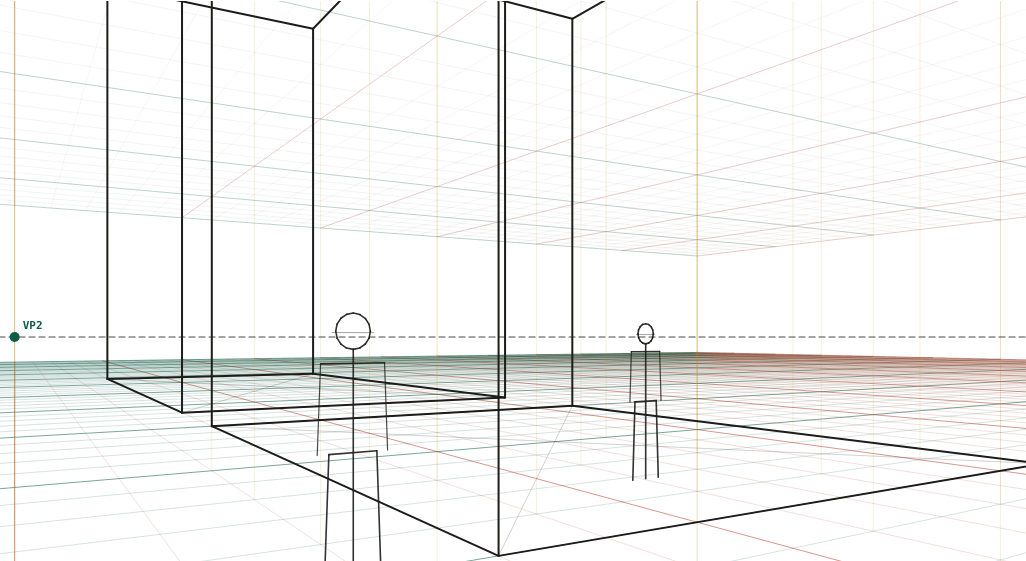
Open the box generator with this street loaded. Drag to turn the corner, change the lens, raise the camera to a balcony; each change moves every building together, because they share one camera.
Step 2 — the ground plan
Decide where the buildings stand before deciding how tall they are. On the grid's metre squares, mark each building's footprint: a terrace house is 6–8 m wide and 10–14 m deep, a shop 8–12 m wide, a city block 30 m or more. Leave the street its width, 6 m for a lane, 10–12 m for a road with pavements, 25 m for an avenue. The footprints tell you where each building's nearest vertical corner lands, and that corner is the one line of each building you draw at true scale.
Step 3 — the boxes
Raise a vertical from each near corner and mark its height in metres: 3 m per storey, 4 m for a shop floor, 6.5 m for a two-storey house, 12 m for four floors. Run the top and bottom of each box to the vanishing points, one for the front, one for the side. In two-point the front of every building goes to one point and its side to the other, provided the buildings are square to the street; a building set at an angle gets its own pair of points on the same horizon.
Now the check that saves most drawings. Every building's base sits on the ground, so every base line rises toward the horizon as it recedes and every top line above eye height falls toward it. If a base line falls, the building is floating; if a top line below the horizon falls, the building is sunk. The horizon is the hinge, and a glance along it finds the mistake.
Step 4 — floors and bays
Turn the near corner into a ruler. Mark every floor height on it, 3 m, 6 m, 9 m, and run each mark to the vanishing point along the facade: those are the floor lines, and every window sill, lintel and cornice sits on one of them. Because the marks are on the near corner, where the scale is true, the divisions are exact without any calculation.
Along the facade the bays get narrower with distance, and the grid squares show by how much. Without a grid, use the diagonal: draw the first bay, run a diagonal from its bottom near corner through the midpoint of its far vertical edge, and where that diagonal meets the top line is the far edge of the next bay; repeat down the street. Windows go into the bays, doors into the ground-floor bays, and the pattern of the facade, three windows and a door, repeats itself in perspective without being redrawn.
Step 5 — doors, windows, roofs
Doors are 2.1 m tall and 0.9 m wide, so a door's top is always a little above the horizon when you stand in the street and its handle is on it. Windows are recessed, so a window seen at an angle shows one of its reveals, the side wall of the opening, and that reveal goes to the other vanishing point from the wall it sits in. Drawing the reveal is what makes a window read as a hole instead of a rectangle painted on the wall.
Pitched roofs are the first non-box shape. Find the ridge by drawing the gable end: a triangle standing on the top of the end wall, its apex on the vertical line through the wall's centre (found with the diagonals of the end face). The ridge then runs from that apex to the vanishing point of the building's length, exactly like an eave, only higher. Chimneys are small boxes on the roof slope; dormers are small gables cut into it.
Cornices, balconies and signs stick out from the wall and so they need their own small depth toward the other vanishing point, the same trick as the window reveal. Every projection is a thin box.
Step 6 — tall buildings and tilt
For anything much taller than your eye you have to choose. Keep the camera level and the verticals stay parallel; the top of a tower simply leaves the frame, which is how most street photographs look. Or tilt the camera up, and the verticals converge to a point above the picture: three-point perspective, the tourist's photograph of a skyscraper. The tower reference shows the tilt at 20 mm; the rooftop reference tilts the other way. Never mix them: a building with parallel verticals and a visible roof far above eye level is the most common tall-building error.
Step 7 — figures, cars, scale
Nothing sets the size of a building like a person beside it. Put a 1.75 m figure at the door: its head on the horizon, its feet at the door's base, and the door is 1.2 heads tall, the ground floor two heads, the building however many heads it should be. Cars are 1.5 m tall, shoulder height on the figure, and their roofs sit just below the horizon. The figures lesson and the car lesson have the constructions; the avenue reference has figures at 7, 14 and 26 m down a one-point street.
What usually goes wrong
Buildings on different horizons. One facade's floor lines aim at a point higher than another's. All floor lines of all buildings go to points on one horizon; check each facade's lines against it.
Windows drawn as flat rectangles. Give them a reveal toward the other vanishing point.
Equal bays that stay equal. The far bays must be narrower. Use the diagonal or the grid.
A tall building with a visible roof and parallel verticals. Tilt the camera or lose the roof.
A street too wide or too narrow for its buildings. Measure it on the ground plan in metres before drawing any facade.
Draw this
Draw the reference street at three lenses, 24, 35 and 50 mm, keeping the camera in the same place; then at three heights, ground, standing and balcony. Then take one building and divide it into floors and bays with the diagonal method, without the grid, and check it against the grid afterwards. Ten streets of boxes before a single window is the fastest route.
What to draw next
How to draw a room in perspective · 3-point perspective · figures in perspective · perspective box generator · street references · perspective basics
Questions
How do you draw a building in perspective?
As a box first: decide the horizon (your eye height), pick a lens, place the box's nearest vertical corner, and run its top and bottom edges to the two vanishing points. Then divide the facade into floors by measuring up the near corner and running each floor line to the vanishing point, and divide the length into bays with a diagonal. Windows, doors and roof sit on that grid.
Should I use one-point or two-point perspective for a street?
One-point when you look straight down the street, so the facades on both sides recede to a single point at the end of the road; two-point when you stand on a corner or look across at a building at an angle. Most street photographs are two-point; most drawings of streets that feel like a tunnel are one-point.
How do I divide a wall into equal windows in perspective?
Measure the divisions on the nearest vertical edge, where the scale is true, and run each mark to the vanishing point for the horizontal lines. For equal bays along the receding wall, draw one bay, cross it with a diagonal from a bottom corner through the midpoint of the far edge, and where the diagonal meets the top line is the next bay; repeat. The grid's metre squares do this for you.
Where should the horizon be when drawing a street?
At your eye height, about 1.6 m if you are standing, which is the height of the heads of the people in the street and roughly the top of the ground-floor doors' handles. Every door in the street will be cut by the horizon at the same fraction of its height, which is the easiest way to keep all the buildings on the same ground.
How do I draw a tall building without it looking wrong?
Decide whether the camera is level or tilted. Level, the verticals stay vertical and the top of a tall building goes off the page; tilted up, the verticals converge to a point in the sky and the whole tower fits, leaning inward. Both are right. What looks wrong is mixing them: parallel verticals with a visible roof on a building far taller than your eye.
How do I keep all the buildings in a street the same scale?
Give them the same floor height. A storey is about 3 m, a shop-front floor 4 m, a door 2.1 m. Mark those heights on the near corner of the nearest building and carry them down the street with lines to the vanishing point; every building's floors then land on the same lines, whatever its length.
A new lesson and a new grid, about once a month.
Each lesson arrives by email before it goes on the site, with the grid it was drawn on and the link to open it. Subscribers also get both free starter packs and the subscriber price on the paid ones. Never more than two emails a month; one click to leave.
Handled by Kit on our behalf. Your address is used for this letter and nothing else — see the privacy page.