 by
by Perspective is one idea with a few consequences. The idea: things get smaller as they get further away, and they shrink toward specific points. Learn where those points are and everything else is bookkeeping. You do not need to learn one-, two- and three-point perspective as three separate systems, whatever the textbook implies. They are one system seen from three camera angles, and the horizon does the same job in all of them. Start here and the other lessons on this site stop being a list of methods. Every diagram is a live grid you can drag.
Perspective drawing is the method of drawing three-dimensional space on a flat surface the way the eye or a camera sees it. Two rules do all the work: objects appear smaller the further away they are, and sets of parallel lines converge toward a single vanishing point. Where those points sit depends only on where the viewer is standing and which way they are looking.
Eye level is the horizon
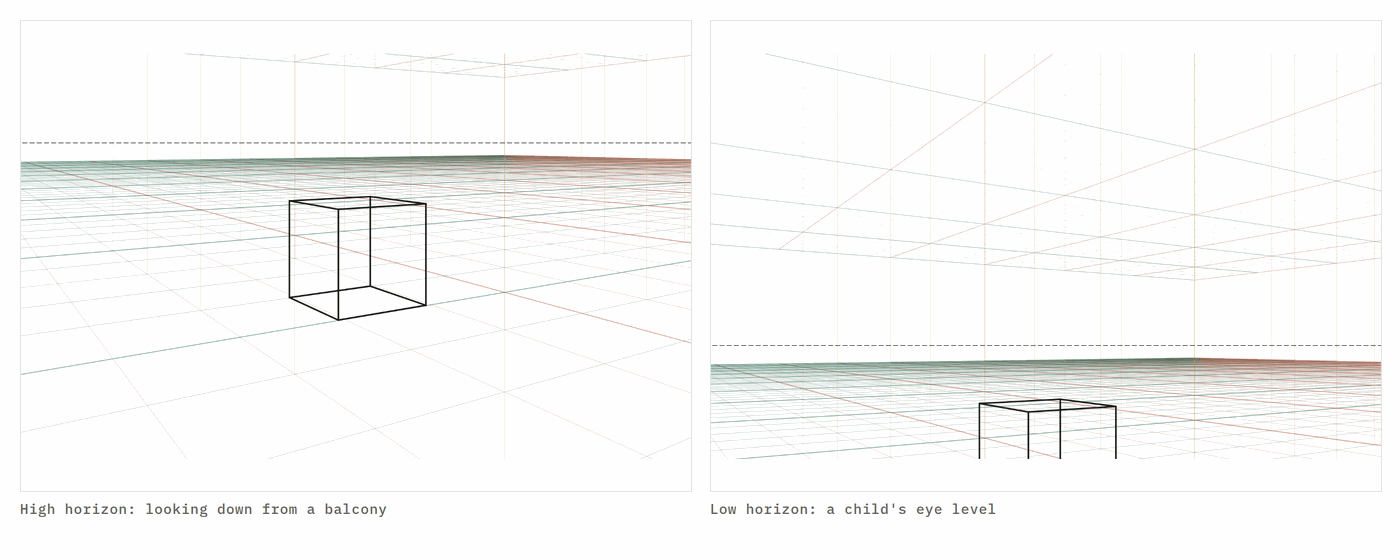
Stand anywhere and imagine a horizontal plane at the height of your eyes. Where that plane reaches the far distance is the horizon line. Everything at your eye level, no matter how far away, sits on that line. Everything above it you see the underside of; everything below it you see the top of.
That gives you a rule you can check in any photograph: the horizon is at the camera's height. A photo taken kneeling has a low horizon; from a balcony, a high one.
Parallel lines meet at a vanishing point
Any set of lines that are parallel in the real world converge to a single point in the picture. Lines that are level (the edges of floors, the tops of walls) converge to a point on the horizon. That is the whole reason the horizon matters: it is where the level vanishing points live.
There is one vanishing point for each direction. A room seen straight on has one direction going away from you, so one point. A box seen from the corner has two receding directions, so two points. Tilt the camera and the vertical direction converges too: three points.
Build a box in one-point
- Draw the horizon.
- Put a vanishing point on it, near the middle.
- Draw a square anywhere below the horizon; that is the front face.
- Run light lines from each corner to the vanishing point.
- Draw a smaller square between those lines to close the back of the box.
You have drawn a box sitting on the ground, seen straight on. Everything in one-point perspective is a version of this.
Build a box in two-point
- Draw the horizon.
- Put two vanishing points on it, far apart, one near each edge of the paper or beyond.
- Draw a vertical line below the horizon; that is the nearest edge of the box.
- From its top and bottom, run lines to both vanishing points.
- Choose where the box ends on each side and draw two more verticals.
- Close the top by running lines from those verticals to the opposite vanishing points.
Scale: the one-metre cube
To keep sizes consistent, decide the height of one thing and derive the rest from it. On the grids here the reference cube is one metre on a side and the grid squares are one metre. A door is two metres tall, a person 1.7, a car about 1.5 tall and 4.5 long. Count squares, and objects at different distances stay in proportion automatically.
Dividing space
To find the middle of a receding face, draw its diagonals; they cross at the perspective centre. To repeat a shape (windows, fence posts) at equal spacing, draw the first two, take the diagonal through the midpoint of the first to the top of the second, and continue. Grid lines do this for you, which is the main reason to draw over one.
Where things stand: depth on the ground plane
Once the box is right, the next question is always "how far away is it?". On the grid the answer is a count: the ground squares are one metre each, and they get shorter toward the horizon. An object with its base on the fourth square line is four metres away. Its height comes from the reference cube at the same depth: find the square it stands on, look at how tall the cube would be there, and scale. Two people on the same ground line are the same distance away and therefore the same height on the page, however far apart they are sideways; that is the check that catches most crowd-scene mistakes.
Objects that float (a lamp, a bird, a sign) still have a spot on the ground directly beneath them. Draw that spot first, raise a vertical from it, and measure the height against the cube. Nothing in a perspective drawing is placed in the air; everything is placed on the ground and lifted.
The lens
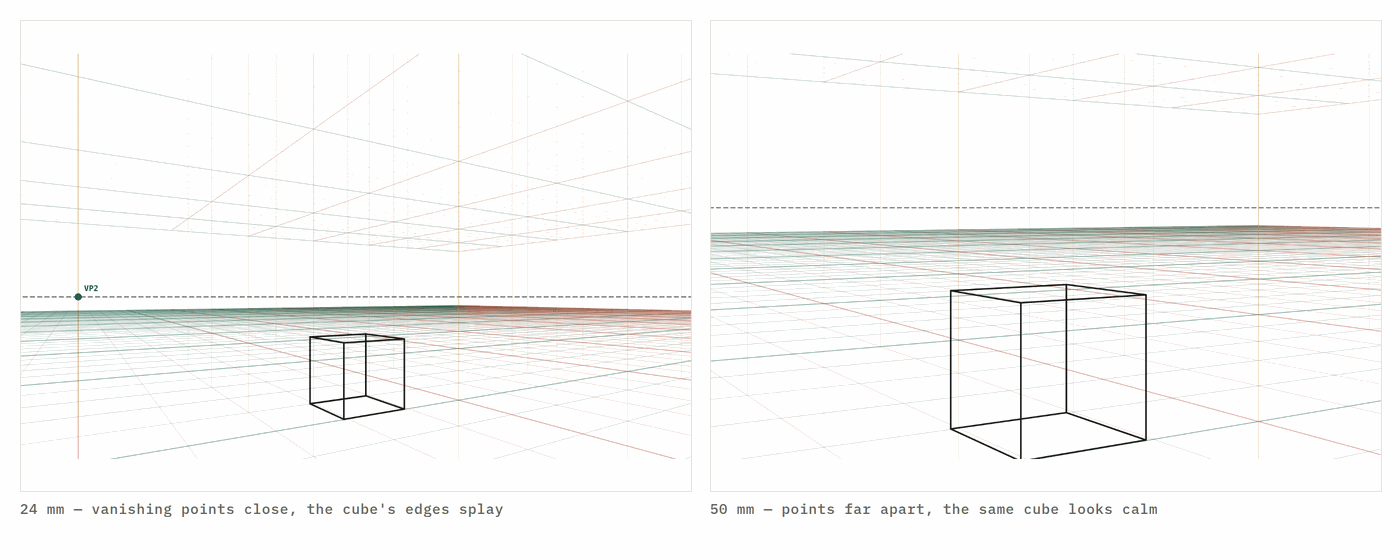
Vanishing points close together make a dramatic, close-up picture; far apart, a calm, distant one. In camera terms that is a wide lens versus a long lens. Every grid on this site shows the lens in millimetres, so you can copy the feel of a photograph or a film frame instead of guessing. A 24 mm grid puts the two-point vanishing points about a picture-width apart and everything near the edge stretches; a 50 mm grid puts them two picture-widths apart and the drawing looks the way most people imagine "normal"; an 85 mm grid is close to a technical elevation. If a drawing feels wrong and you cannot say why, it is very often the lens: the points are too close for the calm scene you intended, or too far for the drama you wanted.
A ten-minute worked example
Draw a kitchen table with a mug on it, two-point, 35 mm, standing eye level. Open the 2-point grid at those settings. The table top is a box 1.5 by 0.9 metres, 0.75 metres high: mark its footprint on the ground grid first (a rectangle one and a half squares by one), raise the four legs as verticals, and close the top by running lines to both vanishing points. The mug is a small box on the table top, a tenth of a metre each way; its base sits on the table plane, not on the ground, so its height is measured from the table, and its ellipse rim is drawn inside a square on that plane. Add a chair as a stack of two boxes (seat 0.45 high, back 0.9). Stop. If the table looks like a table, you have learnt the whole method; everything else is more boxes.
Common mistakes and how to see them
The horizon is in the middle by default. Decide the viewer's height first. A standing view has the horizon at 1.6 m, which is above the tops of tables, chairs and car roofs: you see the top of all of them.
Vanishing points on the page. In two-point they almost never are, unless the lens is very wide. Points on the page make everything look like a fisheye photograph.
Verticals that lean. With a level camera they are perfectly vertical. If yours lean, either the camera is tilted (three-point) or you are drawing the far edges by eye. Use a ruler for verticals until they are automatic.
Objects that shrink sideways but not in depth. The far side of a box must be shorter than the near side in every direction that recedes. Check by extending the top and bottom edges: they must meet at the point.
Guessing sizes. Use the cube. Every object in the drawing should be measurable against it.
Next: 1-point vs 2-point vs 3-point, then three-point step by step. To try each grid on the same scene, the perspective grid generator switches between them without resetting the camera.
On paper, the printable 1-point and 2-point grids, and the grid with scale figures, use the same lens and eye height as the embeds above.
Questions
What is the difference between the horizon line and eye level?
They are the same line. The horizon is where your eye level meets the far distance. If the true horizon is hidden by buildings, the eye-level line is still there, and every vanishing point for level surfaces sits on it.
How do I find the vanishing point in a photo?
Extend two edges that you know are parallel in real life (the top and bottom of a wall, the two sides of a road). Where they cross is the vanishing point, and the horizon passes through it.
Do I have to use a ruler?
For learning, yes: it makes the logic visible. Later, most artists sketch freehand and check against a grid, which is exactly what the tools here are for.
What is perspective drawing?
A method for drawing three-dimensional space on a flat surface so that it looks the way the eye or a camera sees it: things shrink with distance, and parallel lines converge toward vanishing points on the horizon (eye level). One-, two- and three-point perspective differ only in how many directions converge.
How do I make perspective in a drawing without a grid?
Draw the horizon at the height of the viewer's eyes, mark one or two vanishing points on it, and build everything as boxes whose receding edges aim at those points. Check sizes against one known object (a door, a person). A grid does the same job faster and more accurately, which is why most artists draw over one.
Where should the horizon line be in a drawing?
At the eye level of the viewer. Standing: about 1.6 m above the ground, which puts it a little above the middle of a typical picture. Sitting or a child's view: lower. A balcony or a drone: high, or above the frame. The horizon height calculator gives the exact position for a camera height, tilt and lens.
A new lesson and a new grid, about once a month.
Each lesson arrives by email before it goes on the site, with the grid it was drawn on and the link to open it. Subscribers also get both free starter packs and the subscriber price on the paid ones. Never more than two emails a month; one click to leave.
Handled by Kit on our behalf. Your address is used for this letter and nothing else — see the privacy page.