 by
by A head is a box with a face on it, and that is the whole trick of drawing the head in perspective. Portrait artists learn the features first and struggle with angles for years; perspective artists learn the box first and the features fall into place. This lesson takes the second route, and the place it pays off is the view from above or below, where feature-first drawings collapse. A head tipped back is not a front view with the eyes moved up; it is a box seen from underneath, and once you can draw the box the face has nowhere wrong to go. It uses the 3-point grid here to show the box, because the angles of a head are exactly the angles of a camera.
Head in perspective means a head drawn as a three-dimensional solid seen from a particular angle, so that the features sit on its surface rather than on the paper. The practical method is to draw a simple box (or a sphere with the sides sliced flat) at the pose's angle, mark the centre line of the face and the eye line as curves on that solid, and place every feature on those two lines.
The head as a box
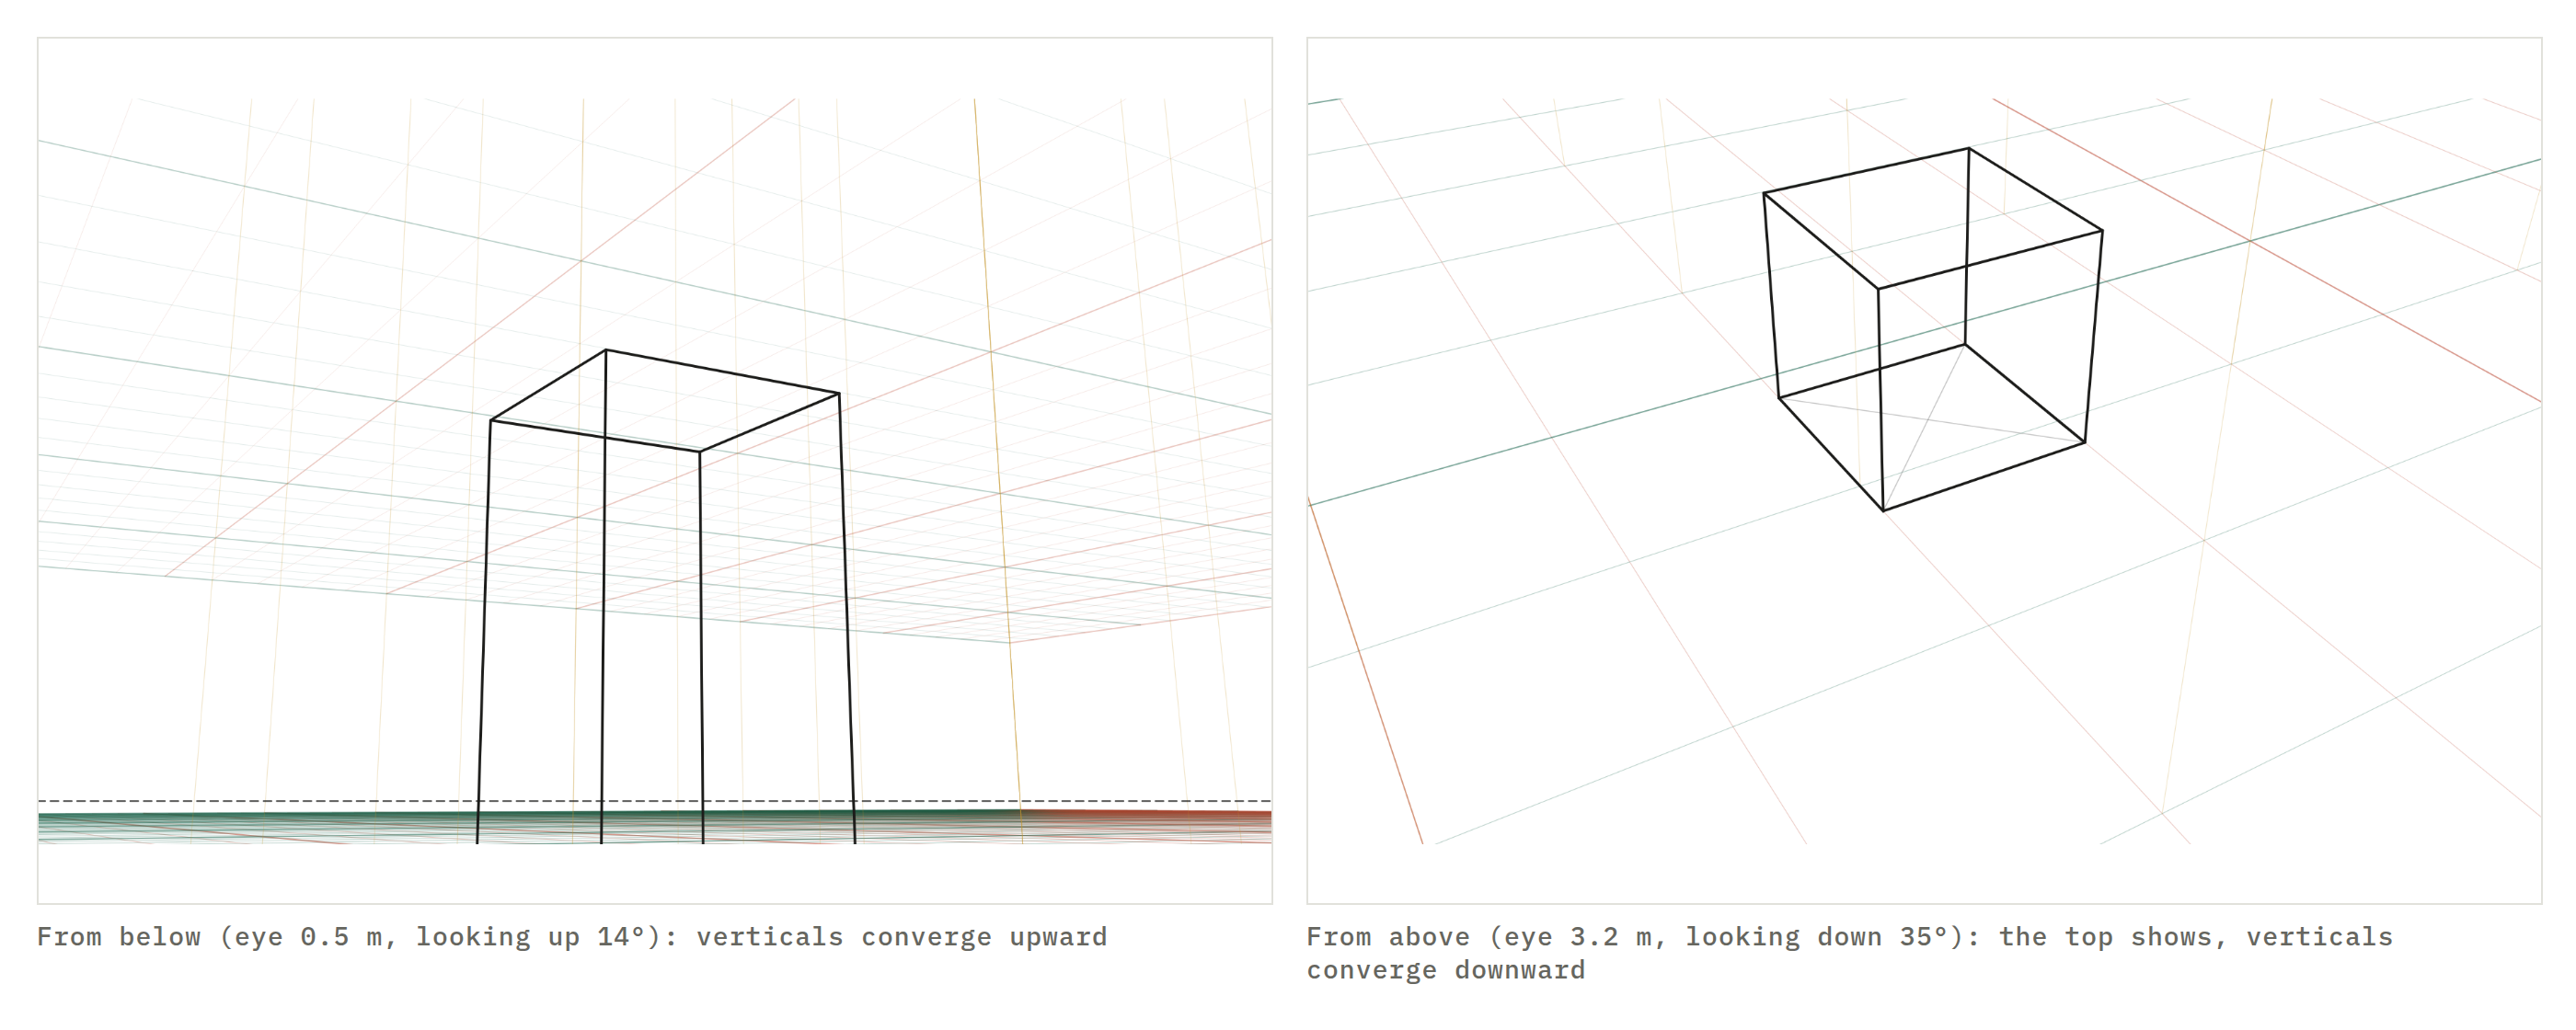
An adult head fits a box about 15 cm wide (ear to ear, not including the ears), 20 cm deep (brow to back of skull) and 23 cm tall (crown to chin). The proportions matter less than the fact that it is deeper than it is wide: a head seen from the side is noticeably longer than a head seen from the front, and beginners draw them the same because they are drawing a circle.
Draw the box at the angle of the pose. Its front face is the face; its two side faces carry the ears and the jaw; its top is the crown; its underside is the jaw's underside and the neck's attachment. Once the box is right, the drawing is a matter of carving: round off the corners, cut the cheeks in under the cheekbones, hang the jaw from the ear.
The reason to start here rather than with the classic sphere is that a box shows its angle. A sphere looks the same from everywhere; a box seen from below is visibly seen from below, because you can see its underside and its vertical edges converge upward. That visibility is what you need when placing features. The sphere method (Loomis and its descendants) is the same idea with a rounded top; use whichever you draw more easily, but be sure the solid has a front, sides, top and bottom you can point to.
Turn, tilt and roll: the three rotations
Every pose of a head is a combination of three rotations, and it helps to know them by name because each one moves the features in a different way.
Turn is rotation around the vertical axis: looking left or right. It moves the centre line of the face sideways across the front of the box and shows more of one side plane. The far eye narrows, the near ear moves toward the middle of the picture, and at about 60° of turn the far eye disappears behind the bridge of the nose. On a grid this is the yaw of the camera: a level head turned 30° is a box at 30° to a two-point grid.
Tilt is rotation around the ear-to-ear axis: nodding up or down. It changes which horizontal planes are visible. Tilted back, the underside of the jaw, the nostrils and the underside of the brow show, and the eye line curves upward. Tilted forward, the top of the skull and the brow show and the eye line curves downward. On a grid this is the pitch: the third vanishing point appears, above for a head seen from below and below for a head seen from above.
Roll is rotation around the nose-to-back axis: leaning the head toward one shoulder. It rotates the whole drawing without changing which planes are visible, so the eye line stays the same shape and simply tips. Roll is the one rotation the grid tools do not model, because a camera roll and a head roll are the same thing as tilting the paper: draw the head level, then rotate it.
The two lines that place everything
With the box drawn, two curves on it do the work of placing the features.
The centre line runs from the crown, down the middle of the forehead, along the bridge of the nose, through the middle of the mouth to the point of the chin, and continues under the jaw to the neck. On the box it is the vertical mid-line of the front face. When the head turns, it moves sideways and, because the face is rounded, it curves: it is straight only when the head faces you.
The eye line runs around the head at the level of the eyes, halfway between crown and chin on an adult. On the box it is a horizontal line around all four faces. When the head tilts, it curves: a level head has a straight eye line, a head tilted back shows it as an upward bow (you are seeing the underside of the ring), a head tilted forward shows a downward bow.
Where the two cross is the bridge of the nose, and from that crossing the rest follows by fractions. The brow is a little above the eye line; the base of the nose halfway from eye line to chin; the mouth a third of the way from the nose to the chin. The ears sit on the side planes between the eye line and the base of the nose. All of these are marked on the surface of the box by lines parallel to the eye line, and they curve the same way it does.
The eye line matters more than any other mark in the drawing. If it is straight the head reads as level; if it bows upward the head is looking up; if it bows downward the head is looking down. Get its curve right first and the tilt is settled before you draw a single feature.
The three-quarter view
The three-quarter view (turned about 30–45°, level) is the most drawn and the most useful. On the box: the front face and one side face are both visible, the front wider than the side. The centre line sits about a third of the way across the front face from the near edge. The near eye is the full width; the far eye is compressed to perhaps two-thirds and sits closer to the bridge of the nose. The near ear is visible on the side plane; the far ear is hidden. The far cheek's outline bulges slightly past the far eye, which is the line beginners most often leave out and the one that most makes a three-quarter head look solid.
On the 2-point grid, this is a box at 35°: the two vanishing points are where the edges of the front face and the side face lead. On a head the convergence is small because the head is small, but it is there: the far edge of the front face is a little shorter than the near edge.
Looking up and looking down
These are the views that most often go wrong, and the box is what fixes them.
From below (the viewer lower than the head, or the head tilted back): the underside of the box shows. The jaw line is long and visible; the underside of the nose shows both nostrils; the eyes sit high in the face, close under the brow, and the brow seems to press down on them. The eye line curves upward and the forehead is compressed to a narrow band. The ears sit higher than the eyes in the picture. The top of the head is invisible.
From above (the viewer higher, or the head tilted forward): the top of the box shows. The crown and forehead are large; the features are compressed toward the chin; the eye line curves downward; the ears sit lower than the eyes; the nose overlaps the mouth; the chin nearly disappears into the neck. This is the view of anyone looking at a phone.
The angle of the box is the angle of the camera. Set the 3-point grid to look up 20° and the cube on it is a head seen from below at that angle; look down 20° for the other. It is worth drawing the box from each preset ten times before adding features, because the errors in a tilted head are nearly always in the box, not the face.
Where head drawings go wrong
The pasted face. Features drawn front-on onto a head that is turned or tilted. The box was ignored; draw the centre line and eye line on the box and put the features on them.
A straight eye line on a tilted head. The head is looking up or down but the eyes are level with each other and with the ears. Bow the eye line.
Ears at eye level on a tilted head. From below, ears sit above the eyes in the picture; from above, below them. If the ears are level with the eyes, the head is level, whatever the rest of the drawing says.
The circle head. A round head with no depth reads as a mask. Draw the box's side plane so the skull has a back.
Symmetric eyes in a three-quarter view. The far eye should be narrower and closer to the nose. Equal eyes turn the head back toward the viewer.
Too much convergence. A head drawn with strong vanishing points looks like a building. A head is 20 cm; at any normal viewing distance its edges converge only slightly. The curves of the centre lines carry the perspective; the vanishing points are a check.
Exercises
Set the 3-point grid to a 50 mm lens and draw the cube from these five positions: level and turned 30°; looking up 15°; looking up 30°; looking down 15°; looking down 30°. Draw only the box and the two centre lines, ten times each. Then add the features on the lines. If a head is going to sit in a scene with other figures, the figures in perspective lesson sets its size and the horizon sets its tilt: a viewer standing among seated people looks slightly down at every one of them.
Keep going
How to draw figures in perspective · how to draw 3-point perspective · 1-point vs 2-point vs 3-point · 3-point perspective grid
Questions
How do you draw a head in perspective?
Draw it as a box first. A head fits a box about 15 cm wide, 20 cm deep and 23 cm tall; place the box at the angle you want, then draw the centre line of the face and the eye line on the box's front face as curves that follow its surface. Every feature is placed on those two lines, so if the box is in perspective, the features are too.
What are the three angles of a head?
Turn (rotation left or right, around the vertical axis), tilt (nodding up or down, around the ear-to-ear axis) and roll (leaning the head toward a shoulder, around the nose-to-back axis). Any pose is some combination of the three, and each moves the centre line and the eye line in a predictable way.
Why does the eye line curve when the head tilts?
Because it sits on a rounded surface. On a level head the eye line is straight. When the head tilts back, you are looking at the underside of that curve, so it bows upward; tilted forward, it bows downward. The amount of bow shows how much the head is tilted.
Where is the ear on a turned head?
On the side plane of the box, halfway back, between the eye line and the base of the nose. As the head turns away, the ear moves toward the centre of the picture and the far ear disappears behind the skull; the near ear also appears higher when the head is seen from below and lower when seen from above.
How do I draw a head looking up or down?
Tilt the box, not the features. Looking up: the eye line curves upward, the underside of the jaw and nose show, the eyes sit high in the face and the forehead compresses. Looking down: the eye line curves downward, the top of the head shows, the features stack toward the chin. Draw the box tilted first and the rest follows.
Which vanishing points does a head use?
The same ones as any box at that angle: two on the horizon for a level head turned to one side, and a third above or below when it tilts. A head is small, so the convergence is slight; the curves of the centre lines carry most of the perspective, and the vanishing points are a check rather than a construction.
A new lesson and a new grid, about once a month.
Each lesson arrives by email before it goes on the site, with the grid it was drawn on and the link to open it. Subscribers also get both free starter packs and the subscriber price on the paid ones. Never more than two emails a month; one click to leave.
Handled by Kit on our behalf. Your address is used for this letter and nothing else — see the privacy page.