Stairs from the landing above
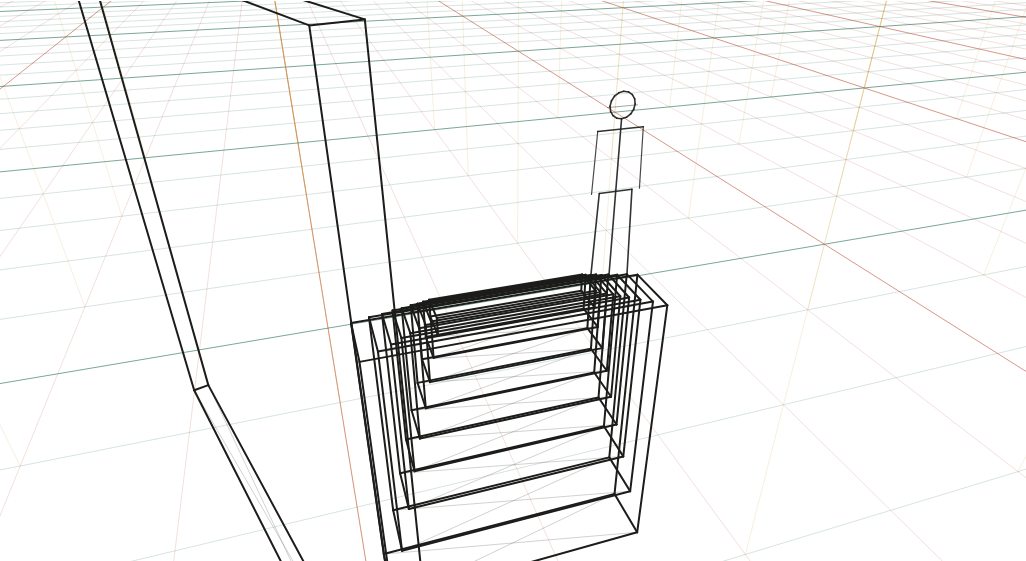
Nine steps descending away from a camera 3.2 m up on the landing, tilted 30° down, with a wall on one side and a figure at the bottom, 24 mm.
What to look at
From above, the treads show their whole top surface and the risers almost disappear: the opposite of the view from the bottom.
The nosings still lie on one straight line, now running down to a vanishing point below the picture, near the third point the walls' verticals lean toward.
The figure at the foot of the stairs is 4.6 m away and below the camera, so the horizon (above the frame) is far over its head: every part of it is seen from above.
What this scene is for
The view down a stairwell from the landing, which is how stairs appear in games, storyboards and comics far more often than the view from below. The camera is 3.2 m up and tilted 30° down, so this is also a working example of a three-point scene that is not a skyscraper.
The mistake it settles
Keeping the verticals vertical. Tilt the camera down by 30° and every upright in the scene leans toward a point below the picture — the wall, the door frames, the figure at the bottom. Draw them parallel and the scene looks like a flat elevation with a strange floor.
The camera
| Lens | 24 mm on full frame |
| Camera height | 3.2 m above the floor (elevated) |
| Rotation | 18° to the scene's axes |
| Tilt | 30° down (three vanishing points) |
| Objects | 1.4 × 0.3 × 1.53 m block · 1.4 × 0.3 × 1.36 m block · 1.4 × 0.3 × 1.19 m block · 1.4 × 0.3 × 1.02 m block · 1.4 × 0.3 × 0.85 m block · 1.4 × 0.3 × 0.68 m block · 1.4 × 0.3 × 0.5099999999999998 m block · 1.4 × 0.3 × 0.33999999999999986 m block · 1.4 × 0.3 × 0.16999999999999993 m block · 0.1 × 3.4 × 3 m block · 1.75 m figure |
| Floor | 1 m squares |
Measured off this render
Taken from the same camera model the tool draws with, on the 1340 × 754 PNG above.
| Angle of view | 73.7° across (24 mm on full frame) |
| Horizon | 139 px above the top edge — outside the picture |
| Depth-axis vanishing point | 335 px from the left edge |
| Width-axis vanishing point | 2,505 px beyond the right edge |
| Vertical point | Nadir 1,170 px below the picture |
| Object | Distance | Height on the render | Below the horizon |
|---|---|---|---|
| 1.4 × 0.3 × 1.53 m block | 2.6 m | 299 px | all of it |
| 1.4 × 0.3 × 1.36 m block | 2.9 m | 250 px | all of it |
| 0.1 × 3.4 × 3 m block | 2.9 m | 770 px | all of it |
| 1.4 × 0.3 × 1.19 m block | 3.2 m | 206 px | all of it |
| 1.4 × 0.3 × 1.02 m block | 3.5 m | 167 px | all of it |
Draw it from these numbers
- The horizon is off the top of the picture, 139 px above the edge. Mark it on a larger sheet, or work from the grid: it is why every roof and every head is below you.
- Two vanishing points on that line: 335 px from the left edge, and 2,505 px beyond the right edge — far enough out that you should match the grid angles instead of chasing it.
- Nothing here is truly vertical: the uprights lean to a nadir 1,170 px below the picture.
- Set the scale from the 1.4 × 0.3 × 1.53 m block at 2.6 m, 299 px tall on the render; the horizon passes above it, so it is shorter than the 3.2 m camera.
Open the reference in the tool to move the camera, change the lens, or add your own objects at real sizes; the share link keeps your version. Draw over the PNG at 30–50% opacity in any app with layers.
Question
Why do I see the treads from above but the risers barely at all?
Because the treads are horizontal planes below the camera and the risers face away from it. From the bottom of the flight the opposite is true: the risers dominate and the treads vanish to lines. Comparing this scene with the two-point staircase reference, drawn from the foot of the flight, is the quickest way to see it.