 by
by There is no Photoshop perspective grid tool. View → Show → Grid gives you flat squares, the Vanishing Point filter's planes vanish when you close it, and nothing in the toolbox snaps a brush to a vanishing point. Searching for "perspective grid Photoshop" mostly returns tutorials for Illustrator, which has had one since CS5 in 2010. Photoshop has added perspective features steadily over twenty years — Vanishing Point in CS2, Perspective Crop in CS6, Perspective Warp in CC 14.2 — and a drawing grid has never been among them. Of the ways round it below, one takes two minutes and the rest take fifteen or cost money. Building a grid by hand with the Line tool is a reasonable thing to do once, to understand the construction, and a waste of a quarter of an hour every time after that.
Perspective grid is a layer of guide lines converging on one, two or three vanishing points, placed under a drawing so that every edge you draw can be aligned with a line that recedes correctly. In Photoshop it has to be a layer, because the program has no native grid object; the good news is that a layer is all you need.
Way 1 — import a lens-accurate grid (two minutes)
This is the method professional concept artists use, with or without a plugin.
Step 1. Open the 3-point perspective grid (or the 1-point, 2-point or curvilinear grid). Set the rotation by dragging, the tilt, and the lens in millimetres: 24 mm for a dramatic street, 35 mm for most scenes, 50–85 mm for products and portraits. Match the aspect ratio to your canvas with the frame control.
Step 2. Click Download PNG at 2× or 4×. The file is transparent with only the lines.
Step 3. Drag the PNG onto your Photoshop canvas. It arrives as a Smart Object; press Enter. Edit → Free Transform if the aspect ratio differs, holding Shift for proportional scaling. Set the layer's opacity to 25–35%, click the padlock to lock it, and create a new layer above it to draw on.
For a vector grid, click Download SVG and use File → Place Embedded; the grid becomes a Smart Object you can scale without softening, and it opens in Illustrator if you need to edit the lines.
Because the grid is computed from a camera model, you can match it to a photograph: run the photo through the vanishing point finder, read its lens and tilt, and open the grid at the same numbers. A drawing on that grid will sit inside the photo without fighting it.
Way 2 — build one with the Line tool (fifteen minutes)
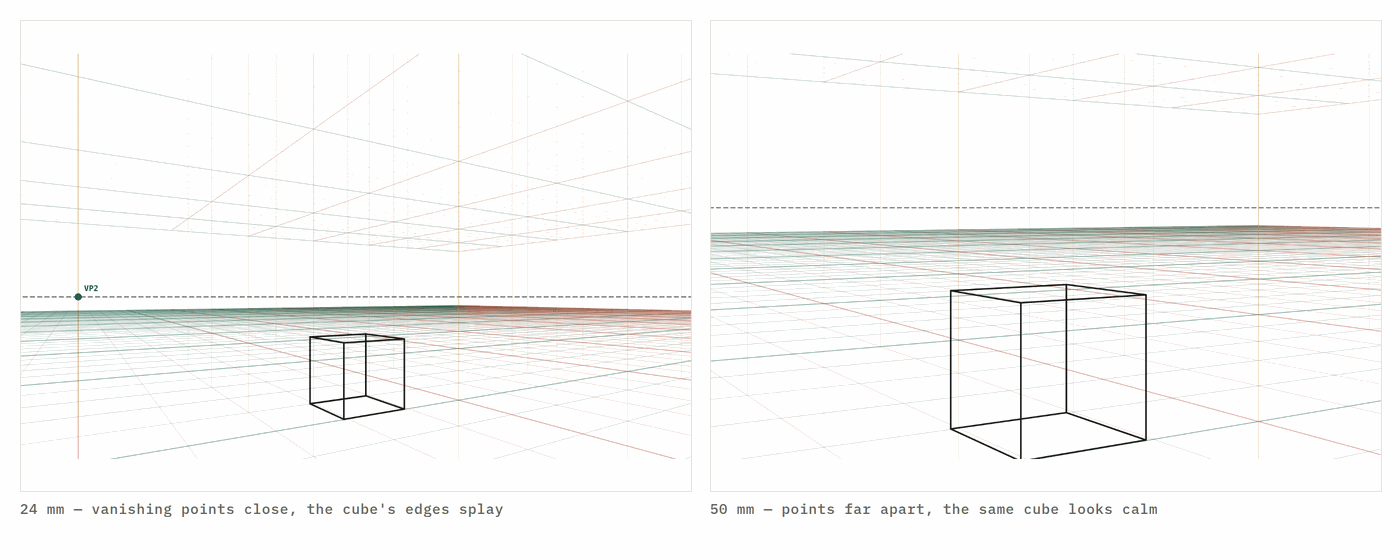
Useful when you want a grid drawn in a particular style, or you are teaching the construction.
Step 1. New layer named "grid". Select the Line tool (U, in the shape tools fly-out), set it to Pixels or Shape, 1 px, a colour that reads against your painting.
Step 2. Draw the horizon: hold Shift and drag a horizontal line at the eye level you want. Drag a horizontal guide (View → Rulers, then drag from the ruler) to the same height so you can find it later.
Step 3. Place vanishing points. Drag vertical guides to the left and right of the canvas where the points should be. For a normal two-point view they belong off the canvas: enlarge the canvas temporarily (Image → Canvas Size, add 100% width) so you can put them outside the picture, then crop back at the end.
Step 4. From each vanishing point, draw radiating lines with the Line tool every few degrees. Faster: draw one line, then Alt/Option-drag the layer's contents with the Move tool to duplicate, and Edit → Free Transform with the reference point moved to the vanishing point to rotate the copy. Repeat.
Step 5. Merge the line layers, set opacity to 30%, lock. Crop the canvas back to size.
The limitation is accuracy: you are placing the vanishing points by eye, so the grid corresponds to no particular lens, and a third point for tilted views is hard to place correctly by hand. The vanishing point distance calculator tells you how far apart the two points should be for a given rotation and lens, which removes the guesswork.
Way 3 — the Vanishing Point filter (for editing photos, not drawing)
Filter → Vanishing Point opens a dialog in which you click four corners to define a plane, then Ctrl/Cmd-drag from an edge to pull out perpendicular planes. Inside those planes the clone stamp, brush, marquee and paste all obey the perspective: you can paste a label onto a box, clone bricks along a wall, or remove a sign and have the texture fill in correctly.
Two things it will not do. It does not save the planes as visible guide lines in the document (there is a Render Grids to Photoshop option in the dialog's menu that draws them once, as pixels, on the current layer, which is sometimes enough), and it has no idea what lens the perspective corresponds to. It is the right tool for retouching a photograph in perspective and the wrong tool for drawing one.
Way 4 — a plugin
Perspective Tools 2 (paid) adds camera-style grids, layer transforms onto grid planes and grid-aware guides, all inside Photoshop. If you only need the grids, Way 1 does that part free; if you want to transform layers onto the grid or work without leaving Photoshop, the plugin is worth its price. The comparison is in Perspective Tools 2 alternative.
Which way to use
| You want | Use | |---|---| | A grid to draw on, quickly, at a known lens | Way 1: import a PNG or SVG | | A grid that matches a reference photo | Way 1 with the vanishing point finder | | To teach the construction, or a grid in a specific style | Way 2: Line tool | | To clone, paint or paste inside a photographed plane | Way 3: Vanishing Point | | Grids plus layer transforms, inside Photoshop | Way 4: plugin |
Read next
Photoshop perspective tools overview · Photoshop Perspective Warp · Photoshop Perspective Crop · Procreate perspective grid · Clip Studio perspective ruler
Questions
Does Photoshop have a perspective grid?
Not as a drawing guide. View → Show → Grid is a flat square grid, and the planes in Filter → Vanishing Point only exist inside that filter. To draw over a perspective grid in Photoshop you build one with lines, buy a plugin, or import a grid image as a layer.
How do I make a perspective grid in Photoshop?
Fastest: generate one with the free grid tool here at the lens and rotation you want, download the transparent PNG at 2×, drag it into Photoshop, set the layer to 30% opacity and lock it. Manual: draw a horizon with the Line tool, place vanishing points as guides, and Alt-drag radiating lines from each point.
Can I snap brushes to a perspective grid in Photoshop?
No. Unlike Clip Studio Paint's perspective ruler or Procreate's Drawing Assist, Photoshop has no perspective snapping for brushes. You can constrain straight strokes with Shift-click and use the Line tool, but strokes will not follow vanishing points automatically.
What about the Vanishing Point filter?
Filter → Vanishing Point lets you define planes and then clone, paint and paste inside them in perspective. It is excellent for editing photographs of walls and boxes, but the planes are not saved to the document as guide lines and you cannot draw freely on them with normal brushes.
Is there a Photoshop perspective grid plugin?
Yes. Perspective Tools 2 by Sergey Kritskiy is the best-known paid one; it adds camera-style grids, layer transforms and grid-aware guides. Free alternatives are the grids on this site, exported as PNG or SVG layers.
A new lesson and a new grid, about once a month.
Each lesson arrives by email before it goes on the site, with the grid it was drawn on and the link to open it. Subscribers also get both free starter packs and the subscriber price on the paid ones. Never more than two emails a month; one click to leave.
Handled by Kit on our behalf. Your address is used for this letter and nothing else — see the privacy page.