 by
by Lightroom perspective correction lives in one panel, called Transform in Lightroom Classic and Geometry in Lightroom and Lightroom mobile, and it is better than most people expect: the Upright buttons, in Lightroom since version 5 in 2013, fix the majority of leaning buildings in one click, Guided Upright handles the rest, and the sliders under them do the fine adjustment. Try the buttons before the sliders. Upright's four automatic modes fix most leaning buildings in one click, and the people who find this panel frustrating are usually the ones who opened with the manual Vertical slider and fought it for ten minutes. The sliders are for the cases Upright misses, not the first move. Adobe's reference is the Upright page in the Lightroom Classic help.
Upright is Lightroom's automatic perspective correction. It analyses the image for lines that ought to be horizontal or vertical (the edges of buildings, the horizon), works out how the camera was tilted, and applies the reverse transform so the lines come back straight. The buttons are Off, Auto, Guided, Level, Vertical and Full; the sliders below them apply the same kind of transform by hand.
Before Upright: lens profile first
Open the Lens Corrections panel and tick Enable Profile Corrections (and Remove Chromatic Aberration). Upright assumes straight edges in the world are straight in the photo; a wide lens bows them, and correcting perspective on a bowed line straightens one end and curves the other. Lightroom itself recommends this order, and if you turn profile corrections on after applying Upright, click Update at the top of the Transform panel so it re-analyses the image.
If the horizon is visibly tilted but nothing else is wrong, the Crop tool's Straighten (drag the ruler along the horizon, or Auto) is a lighter fix than Upright.
The Upright modes, in the order to try them
Auto. Levels the image and straightens verticals and horizontals, but deliberately stops short of a full correction to keep the picture looking natural and to lose as little of the frame as possible. Start here for anything that is not pure architecture: streets, interiors with people, landscapes with a building in them.
Level. Only the horizontal tilt. It is Straighten with a smarter eye. Use it when the verticals are fine (a level camera) but the horizon is off.
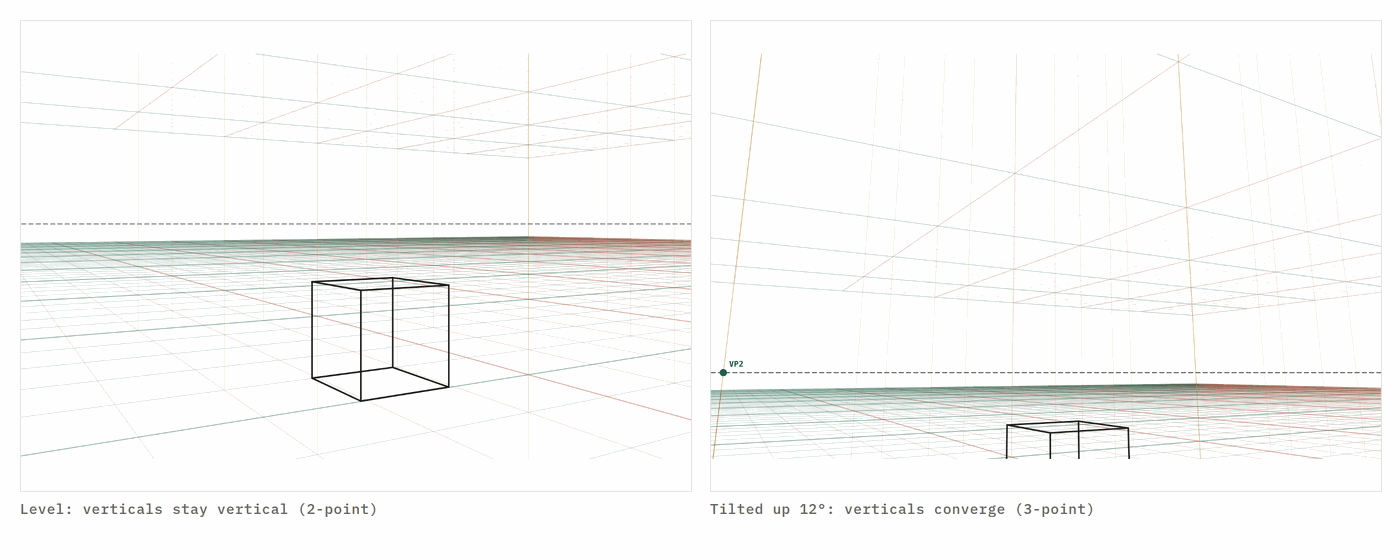
Vertical. Levels, then straightens converging verticals. This is the one for the classic leaning-building photo taken with the camera pointed up. It leaves horizontal convergence alone, so a building seen from a corner still recedes correctly to its vanishing points; only the uprights are made upright.
Full. Level, vertical and horizontal, all the way. It turns a façade seen at an angle into a flat elevation. Right for a straight-on shot of a building that should read as a drawing, and for documents, signs and paintings; on almost everything else it looks flattened, because it removes the horizontal convergence the eye expects. Try it, then compare with Vertical.
Guided. You draw the lines. Click the Guided Upright tool (the icon at the top-left of the panel; Shift+T toggles it in Classic) and drag a guide along an edge that should be vertical or horizontal. Two guides on verticals straighten a building; two on horizontals level it; four, two of each, do both. The image transforms as soon as the second guide is placed, and a loupe magnifies the cursor so you can put guides on an edge precisely. Drag a guide's end points to refine it; click a guide and press Delete to remove it. Guided is the mode for pictures where the automatic modes pick the wrong edges (a diagonal roof, a leaning tree), and for interiors where the important lines are door frames rather than the outline of the room.
Each mode is a fresh analysis, so clicking one replaces the previous one rather than adding to it. Off returns to the original.
The Transform sliders
Under the buttons are the manual controls, and they work with or after an Upright mode.
Vertical tilts the image about a horizontal axis: negative to bring the tops of leaning buildings out, positive to push them in. Horizontal does the same about a vertical axis, for walls seen from one side. Rotate levels. Aspect stretches the image wider or taller, which matters after a vertical correction: a tilted camera also foreshortens a façade, so after Vertical the building often looks too tall, and a few points of negative Aspect (wider) restore it. Scale shrinks or enlarges inside the frame, useful for pulling the edges back in view. X Offset and Y Offset slide the image within the frame.
The habit that gets natural results: apply Vertical (or Auto), then check the building's windows. If they look tall and narrow, reduce Aspect until they look square. Most over-corrected photos are wrong in Aspect, not in Vertical.
Constrain Crop and the white edges
Any perspective correction leaves transparent wedges at the edges, because the image has been pulled into a trapezoid. Constrain Crop crops to the largest rectangle inside the corrected image automatically. It is quick and loses more than necessary on one side; for a picture where the edge matters (a building that just fits the frame), leave it off, use Scale and Y Offset to keep the important edge, and crop by hand. If a corner is still empty, Edit In → Photoshop and Content-Aware Fill it, or leave it to be cropped later.
Because these are all lens-shift transforms rather than a re-photograph, a strong correction stretches the top of the image: the same number of pixels now covers a larger area, and the top of a tall building will be softer than the bottom. Shoot with the camera as level as you can and use Scale and cropping instead of extreme Vertical values when you can; the softness cannot be sharpened back.
Lightroom, Lightroom mobile and Camera Raw
Lightroom (the cloud version) has the same tools in the Geometry panel: the Upright buttons, a Guided tool, the sliders, and Constrain crop. Lightroom mobile has Geometry too, with Guided Upright drawn by touch. Camera Raw in Photoshop has the same Geometry panel, with the same behaviour. The instructions above apply unchanged; only the panel name differs.
Drawing on a grid: what Lightroom cannot do
Lightroom corrects photographs; it does not draw perspective grids or vanishing points, and it cannot overlay a grid for painting over a photo. For that, read the photo's perspective with the vanishing point finder, which gives its horizon, lens and tilt and opens the matching grid, then export the corrected photo from Lightroom and bring both into Photoshop, Krita, Clip Studio or Procreate as layers. The perspective correction tool here does the four-corner fix in the browser for a quick job on a phone.
When it goes wrong
Upright did nothing. No usable edges were found. Enable Profile Corrections and click Update; if still nothing, use Guided.
Auto picked the wrong lines. Use Guided and draw the guides on the edges you mean.
The building looks too tall after Vertical. Reduce Aspect (wider) until the windows look square.
Full flattened the picture. It removed the horizontal convergence. Use Vertical instead, or Guided with vertical guides only.
The corrected edges are soft. The correction stretched them. Use a smaller correction, or shoot level next time and crop.
Curved lines after correction. Lens distortion was not removed first. Turn Profile Corrections on, click Update.
Read next
Photoshop perspective crop · Photoshop perspective warp · fix perspective in Affinity · perspective correction online
Questions
How do I fix perspective in Lightroom?
In Lightroom Classic open the Develop module's Transform panel and click one of the Upright buttons: Auto for a balanced fix, Vertical to straighten leaning buildings, Full for everything, or Guided to draw two to four lines along edges that should be straight. In Lightroom (cloud) and mobile the same buttons are in the Geometry panel.
What is the difference between Auto, Level, Vertical and Full Upright?
Level corrects only the horizontal tilt (a crooked horizon). Vertical levels and straightens converging verticals. Auto does both but holds back to keep the picture natural and lose as little of it as possible. Full applies level, vertical and horizontal corrections completely, which is right for architecture and often too much for anything else.
How does Guided Upright work?
Guided Upright arrived later than the other four modes, in Lightroom CC 2015.6 and Lightroom 6.6 in June 2016, so a very old installation will not have it. Click the Guided Upright tool (or press Shift+T in Classic), then drag two to four guides along edges that should be vertical or horizontal: two verticals straighten a building, two horizontals level it, four do both. The photo transforms as soon as two guides are drawn. Drag a guide's ends to refine it; select it and press Delete to remove it.
Why is Upright greyed out or doing nothing?
Upright needs edges to analyse; a photo without clear straight lines returns no correction. Enable Profile Corrections in the Lens Corrections panel first, then click Update in the Transform panel so Upright re-analyses. If it still finds nothing, use Guided or the manual sliders.
How do I get rid of the white edges after correcting perspective?
Tick Constrain Crop in the Transform panel and Lightroom crops to the largest rectangle inside the corrected image. Or leave it off and use the Scale and Offset sliders, then crop by hand to keep more of a particular side. For a big gap, fill it in Photoshop with Content-Aware Fill.
Should I fix lens distortion or perspective first?
Lens distortion first, always. Enable Profile Corrections (and Remove Chromatic Aberration) in Lens Corrections, then apply Upright. Perspective correction assumes straight lines are straight; if the lens has bowed them, Upright straightens a curve at one end and bends it at the other.
A new lesson and a new grid, about once a month.
Each lesson arrives by email before it goes on the site, with the grid it was drawn on and the link to open it. Subscribers also get both free starter packs and the subscriber price on the paid ones. Never more than two emails a month; one click to leave.
Handled by Kit on our behalf. Your address is used for this letter and nothing else — see the privacy page.