 by
by To fix perspective in Affinity Photo you have two places to go: the Affinity perspective tool, which reshapes the pixels, and the Perspective live filter, which does the same thing non-destructively. Both use the same four-corner idea and both exist in Affinity Photo 2 and Affinity Designer 2, the version 2 line Serif released in November 2022; the steps below also hold in the 1.x versions, where the panels sit in the same places. Serif's reference is the Perspective tool page in the Affinity Photo help; this guide is the walk-through with the settings that matter, the mistakes that cost people an afternoon, and the one thing Affinity cannot do.
Perspective correction is the process of pulling the four corners of a plane back to a rectangle so that lines which converged in the photograph (because the camera was tilted) become parallel again. A leaning building, a keystoned whiteboard and a page photographed at an angle are all the same problem: one flat plane seen obliquely.
Before you start: what kind of problem is it?
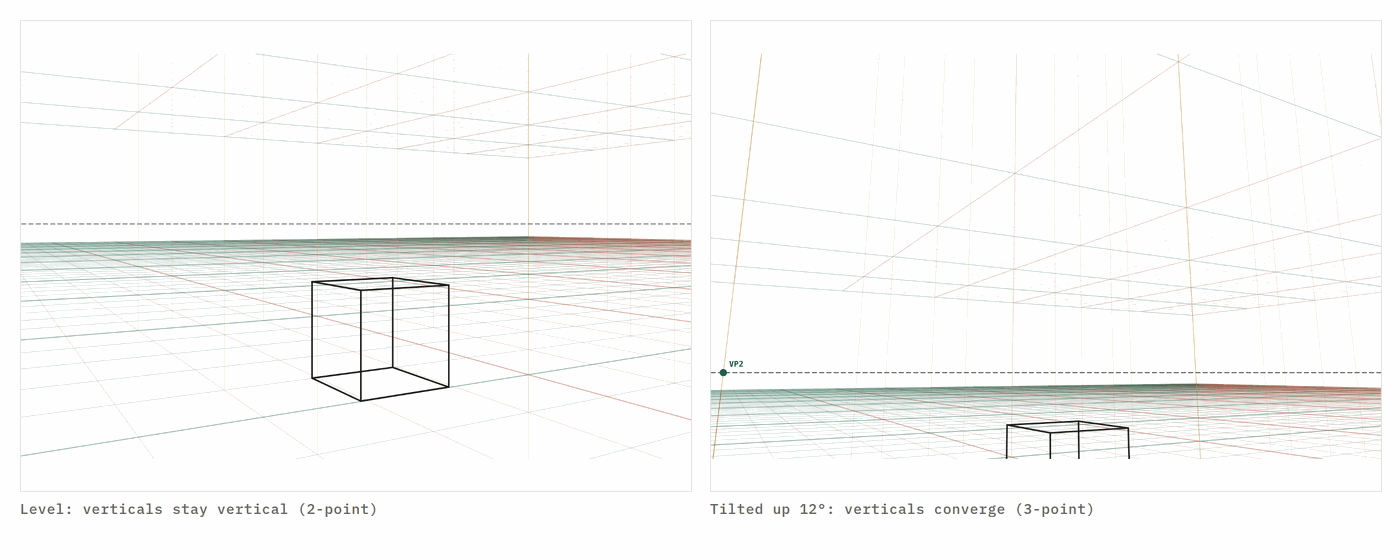
Look at the picture and decide which of three things is wrong, because they have three different fixes.
Converging verticals. A building whose sides lean inward toward the top. The camera was tilted up. This is perspective, and it is what the tool below fixes.
Curved lines. Straight edges that bow outward near the frame edge. That is lens distortion, not perspective. Fix it first with the Lens Distortion filter (Filters → Distort → Lens Distortion) or in the Develop persona for a RAW file, otherwise the perspective tool will try to straighten a curve and fail on both ends.
A tilted horizon. The whole picture rotated a few degrees. Use the Crop tool's straighten mode (drag along a line that should be level) before anything else. Rotation, distortion, then perspective, then a final crop, in that order.
Affinity Photo perspective tool: straightening a building
Open the photo, make sure the layer you want to fix is a pixel layer (see the greyed-out note below), and select the Perspective tool in the Tools panel. A grid appears over the layer with four corner handles. The context toolbar across the top holds the four settings you need: Planes (Single or Dual), Mode (Destination or Source), Show Grid, and Autoclip.
Step 1 — tell Affinity where the perspective is. Switch Mode to Source. In Source mode the corners describe the plane as it appears in the photo. Drag each corner so that the grid's outer edges run exactly along the building's edges: the two verticals down the corners of the façade, the top along the roofline, the bottom along the ground floor. Tick Show Grid and use the inner grid lines to check that windows and floors line up with them. Zoom in for the corners; a few pixels of error at a corner becomes a visible lean across the whole façade.
Step 2 — pull it straight. Switch Mode to Destination. The grid snaps back to a rectangle and the building is pulled straight with it. If the result looks too tall or too squat (it often does, because a tilted camera also foreshortens the façade), drag the top corners up or down until the windows look square. Hold Shift while dragging to constrain a corner to one axis.
Step 3 — Apply, then crop. Press Apply in the context toolbar. The corners of the canvas now show transparent wedges where the image was pulled inward; crop them out with the Crop tool, or, if you would rather keep the frame, fill them with Inpainting. With Autoclip on, Affinity clips the result to the canvas automatically, which is fine for a quick fix but hides how much you have stretched.
Dual Plane does the same operation on two faces of a box at once: a building corner, a product box, a room corner. Each plane has its own four corners sharing the vertical edge between them. It is worth the extra minute whenever both faces need to read correctly.
Affinity Photo: the Perspective live filter
Layer → New Live Filter Layer → Distort → Perspective. It works like the tool, with the same Source/Destination modes, but it stays editable: double-click the filter layer later and move the corners again, change the mode, or delete it to get the original back. Use the live filter for anything you might revisit, for anything that will be stacked with other adjustments, and for retouching where you want to compare before and after with one click of the layer's visibility.
Two details matter. Clip the filter to the layer it should affect (drag it onto the layer thumbnail) rather than leaving it at the top of the stack, otherwise it distorts every layer beneath it. And keep the filter above any Lens Distortion or sharpening filters so corrections apply in the right order: lens, then perspective, then sharpening.
Fixing a scan or a photographed document
For a page, a whiteboard or a painting photographed at an angle, the workflow is the same but the target is known: the plane is a rectangle of known proportions. Use the Perspective tool in Source mode with the four corners exactly on the page's corners (zoom to 200% for each), switch to Destination, and Apply. Then crop to the page and, if you know the paper size, use Document → Resize Document to set the correct proportions so the text does not end up subtly wide or narrow. Follow with a light Unsharp Mask: resampling always softens a little.
When the Perspective tool is greyed out
The tool only works on pixel layers. If it refuses to activate, the selected layer is probably an Image layer (placed images come in this way), a group, a vector shape or a text layer. Right-click the layer and choose Rasterise, then try again. A locked layer needs unlocking first (the padlock in the Layers panel). If nothing is selected at all, the tool is also disabled; click the layer in the Layers panel.
If the grid appears but does not cover the whole image, the layer has been moved or scaled: the tool works on the layer's own bounds, not the canvas. Rasterising also fixes this by trimming the layer to the canvas.
Affinity Designer
Affinity Designer 2 has a Perspective tool in the Designer persona that works on vector shapes, text and placed images, with the same four corner handles. Text stays editable inside the transform, which makes it the right tool for putting a label on a box or a sign on a wall in a vector mockup. In Designer 1, switch to the Pixel persona to reach the Perspective tool, which rasterises the layer. For placing artwork on a mockup, put the artwork in an embedded document first (File → Place, then choose Embedded) so it stays editable and can be swapped later.
Affinity Photo for iPad
The iPad version has the same Perspective tool in the Tools bar and the same live filter under the Layers studio's filter menu. The context toolbar becomes a row of controls above the canvas; Mode is there, and the corners are dragged with a finger or the Pencil. Everything above applies unchanged.
The no-software way to get a perspective grid
Affinity corrects existing images; it does not draw a perspective grid for you to paint over. For that, set up a grid here and bring it in.
Download SVG and use File → Place in Affinity Designer or Photo. The lines arrive as vector curves on their own layer: lock it, lower the opacity to 30–40%, and draw over it on a new layer. Download PNG works the same way for a raster layer. Because the grid is computed from a real camera model, you can match it to the photo you have just corrected: run the photo through the vanishing point finder to read its lens and tilt, then open the 3-point grid with the same settings and place a drawing inside the photographed scene.
Where to go next
Perspective correction online does the same four-corner fix in the browser without opening Affinity · Photoshop perspective tools · Illustrator perspective grid · the perspective tools guide
Questions
Where is the perspective tool in Affinity Photo?
In the Tools panel as the Perspective tool (grouped with Mesh Warp on the default layout), and non-destructively as Layer → New Live Filter Layer → Distort → Perspective. In Affinity Photo 2 both are in the Photo persona.
How do I straighten a building in Affinity Photo?
Select the Perspective tool, set Mode to Source, drag the four corners so the grid lines follow the building's vertical and horizontal edges, then switch Mode to Destination and pull the corners back to a rectangle. Or add a Perspective live filter and drag the corners directly.
Why is the Perspective tool greyed out in Affinity Photo?
Usually because the selected layer is not a pixel layer: an image layer, a group or a vector shape. Rasterise the layer (right-click → Rasterise) or select a pixel layer. On a locked layer, unlock it first.
Can Affinity Designer put an image into perspective?
Yes. Affinity Designer 2 has a Perspective tool in the Designer persona that works on vector shapes, text and placed images. In Designer 1, switch to the Pixel persona to reach the Perspective tool, which rasterises the layer.
Does fixing perspective lose image quality?
Slightly. Every corner you pull outward stretches pixels, so the corrected region is resampled and softens a little. Work at full resolution, avoid correcting twice, and apply a small Unsharp Mask afterwards. The live filter lets you adjust without stacking corrections.
How is perspective correction different from lens correction?
Lens correction removes barrel or pincushion curvature caused by the lens; perspective correction removes convergence caused by tilting the camera. Do lens correction first (Develop persona or Filters → Distort → Lens Distortion), then perspective, then crop.
A new lesson and a new grid, about once a month.
Each lesson arrives by email before it goes on the site, with the grid it was drawn on and the link to open it. Subscribers also get both free starter packs and the subscriber price on the paid ones. Never more than two emails a month; one click to leave.
Handled by Kit on our behalf. Your address is used for this letter and nothing else — see the privacy page.